
How To Activate Your Plant-Based Ingredients For Better Digestion
Nov 10, 2022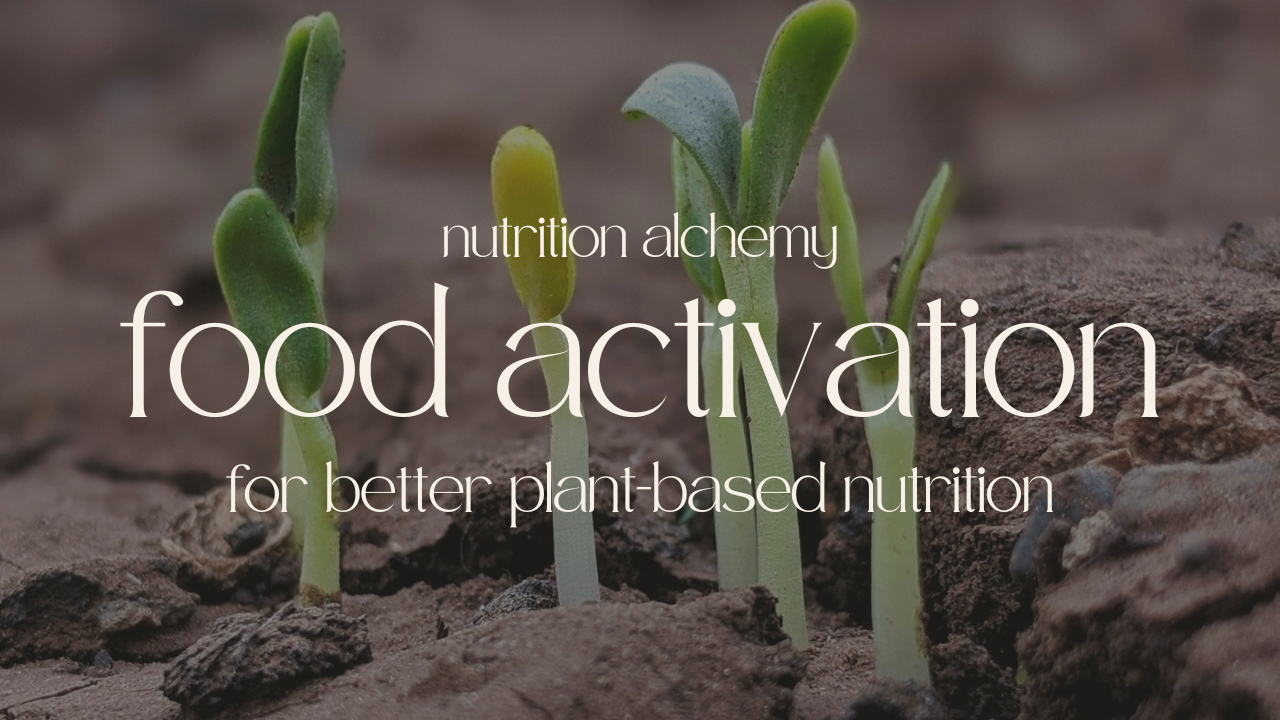
Food activation is so important for plant-based people, especially if you’re more Vata-Dosha dominant, however, all of the Doshas will benefit greatly.
If you struggle with bloating and gas or indigestion when eating a plant-based diet, activating your foods can help with this.
What is food activation?
Food activation is a simple process where we 'activate' the nutritional benefits of the ingredient (legumes, grains, nuts, seeds, and even some vegetables).
So much of the nutrition in raw plant-based foods are inaccessible, by Nature. This defence mechanism allows for seeds to spread and grow across the land.
Think of a bird eating a seed, flying hundreds of kilometres away, pooping out that seed, and then Nature takes it from there: germinating and growing that seed into a new tree.
Our digestive systems are happiest when we soak, sprout or ferment (AKA activate) these ingredients before eating them. It makes the world of difference in flavour, digestion, nutrients, and absorbability.
How to activate your ingredients
Food activation is simple and can seamlessly fit into your daily routine with some light planning.
The first thing to know is that your ingredients must be raw and unseasoned.
- You can soak you nuts, seeds, grains and legumes with a pinch of salt to help break down phytic acid.
- You can sprout your nuts, seeds, grains and legumes, which usually takes 3-7 days.
- You can ferment your ingredients, including some produce and teas (think of sauerkraut, Kimchi, miso paste, kombucha and yogurt).
How to soak your ingredients
You can soak nuts, seeds, grains and legumes to make them easier to digest. You do this by adding the ingredient to a bowl with cold water and a pinch of salt for the allotted time (you can grab my Soaking and Sprouting Guide here). This help to breakdown anti-nutrients which make these ingredients more difficult to digest. After soaking for the allotted time, you can consume them as is, dehydrate until bone dry, or season and roast them.
Pro tip: Soaking is typically 3-12 hours, depending on the chosen ingredient. I've found that most seeds (alfalfa, radish, broccoli, etc) take between 2-4 hours, whereas legumes may take up to 12 hours.
Dehydrating your soaked ingredients for storage
Dehydration is my preferred option for long-term storage of nuts and seeds, because it keeps the ingredient raw, thereby preserving the nutrition value. To be technically 'raw', you want to avoid heating your ingredients above 118°F. When you heat your foods above this temperature, it can denature the enzymes which support your digestion.
Dehydration practices vary, depending on the climate, the tools used (dehydrator or oven), and how much of an ingredient you’re working with. For a regular, 9 x 13 baking sheet of soaked almonds, for example, it may take anywhere from 8 to 12 hours to fully dehydrate in the oven at a low temperature. My oven goes as low as 170°F degrees which works well for me, however they are no longer technically raw.
Seasoning and roasting your ingredients for storage
Seasoning your nuts and seeds is fun, delicious and so satisfying. There are so many flavour combinations to play with.
After soaking your nuts or seeds, drain them and let the majority of the water evaporate. Then, add whatever seasoning you like. You can split a large batch of pumpkin seeds or almonds and do multiple flavour combinations if you're feeling adventurous.
Some delicious flavour combinations for nuts and seeds
- Cinnamon, maple and coconut (coconut oil, cinnamon powder and maple syrup - I do this with my pumpkin or squash seeds)
- Lemon pepper (you can buy lemon pepper spice and add a touch of olive oil - I love doing this with almonds)
- Sweet and smokey (maple syrup, olive oil, liquid smoke, salt, granulated garlic, smoked cayenne pepper [discount code: AMY10] - great for nuts or seeds)
- Sweet and spicy (avocado oil, chilli powder, maple syrup, salt)
- Ranch roasted nuts - I haven't tried these (yet), but do they ever look tasty!
Sprouting your ingredients
Some raw legumes (beans), grains, and seeds can be sprouted for an extra digestion-boost.
Sprouting is an effective way to decrease the anti-nutrients that lock up important minerals, and inhibits our digestive enzymes, which can lead to indigestion and intestinal gas.
Sprouting is exactly what it sounds like, and may add an extra 1-10 days to the process.
You may use a sprouting tray, a sprouting kit, or a glass jar with cheesecloth/mesh and a rubber band. You may also like to use sprouting lids with your mason jars.
Grab my printable Soaking and Sprouting Guide here.
Generally speaking, soaking and sprouting are low maintenance and require little of your energy - you just need to plan for it.
Pro tip: When you buy nuts, seeds, grains and legumes, get into the habit of soaking them right away before storing them. After they’ve been soaked, you decide the next steps for storage (dehydration, seasoning and roasting) or sprouting them to eat in the near future. Sprouts do not store well for long periods of time.
How to ferment your ingredients
Fermented foods and drinks are very trendy right now, however, there is nothing new or trendy about fermentation. Humans have been using fermentation to preserve foods since the Neolithic Era. It’s a traditional food preparation technique that would ensure you could eat fresh produce long after the harvest was over. This one was a major benefit alongside the positive effect they can have on your gut microbiome.
In regards to fermentation, there are three terms you may come across: wild fermentation, lacto-fermentation and culturing. Though these ideas do overlap, they are actually three different processes.
Wild fermentation
Wild fermentation occurs when microbes naturally found on foods or in the air are used to initiate the fermentation process. Essentially, spontaneous fermentation! For example, the initial process of creating a sourdough starter illustrates wild fermentation, as it utilizes wild yeasts found in the air. That is why a sourdough starter originating in different countries or provinces will taste different from one another. Different locations, different environmental yeasts. Neat, eh?
Sauerkraut is another example of wild fermentation. Sauerkraut uses the naturally occurring bacteria on the cabbage, Lactobacillus, to break down and ferment in an anaerobic (without oxygen) environment. If left exposed to oxygen, the cabbage would simply mold. The anaerobic environment paired with a little salt keeps the bad bacteria away and allows the beneficial bacteria (Lactobacillus) to turn into lactic acid. This results in the sour tasting fermented cabbage that we call sauerkraut.
Lacto-fermentation
Lactic acid fermentation (AKA: lacto-fermentation) is a variant of wild fermentation. Lacto-fermentation refers to the specific bacteria, Lactobacillus. Lactobacillus is present on anything grown on the earth. So, sauerkraut is actually an example of both wild fermentation and lacto-fermentation. The naturally occurring Lactobacillus bacteria found on cabbage feeds on sugar, then produces lactic acid as a by-product. With the help of a little salt and an anaerobic environment, these foods naturally ferment.
Culturing
Culturing generally means there has been some sort of microbial starter used to initiate fermentation. Common microbial starters include SCOBYs and powdered starter cultures. Water kefir is an example of culturing. The water kefir grains are actually grain sized symbiotic colonies of yeast and bacteria. These grains feed on sugar water producing a cultured beverage containing beneficial yeast and bacteria.
Some fermented condiments can be considered cultured as well.
As you can see, a wild ferment can also be a lacto-ferment, but not always. A lacto-ferment is a wild ferment. And culturing is a fermentation process where a microbial starter is used.
Your action steps
- Download my free, printable Soaking and Sprouting Guide.
- Start experimenting with sprouting seeds
- Get your equipment (either a sprouting kit, sprouting tray, or a glass jar with a rubber band and cheesecloth.
- Make your own alfalfa, radish, broccoli, or another type of sprout mix
- Explore soaking your nuts
- See how you digest them when they are dehydrated, and/or when they're seasoned and roasted.
- Try soaking your legumes/beans - and bonus if you sprout them, too!
- Chickpeas, black beans, brown or green lentils, mung beans, etc.
- Experiment with your grains
- Soak your wild or brown rice to support your digestive system.
